
Diamonds may be a girl’s best friend — but on stage, it’s her pointe shoes! It can take a long time to learn the ins and outs of what works best for you. Today’s blog is devoted to sewing these incredible shoes and making them more comfortable.
Here is what I use:
- Dental Floss (used in lieu of sewing thread)
- Strong Sewing Needle
- Thimble (to protect my finger when moving the needle through the shoe)
- Scissors
- Pointe Shoes
- Elasticized Pointe Shoe Ribbons (pre-cut to about 22.5 inches for each side)
- 3/4 inch wide Elastic (pre-cut to about 8 inches for each shoe)
- Pencil (for marking where the elastic/ribbon will be sewn in the shoe)
- Shoe Service Tool* (for bumping out areas of the shoe – explained below)
Sewing the Elastics
Elastics are super important. They keep the shoe secure. The elastic has to be deep enough in the shoe to keep the shoe on your foot during turns and jumps. It has to feel firm enough, so you can move confidently. Personally, I like my elastics on the tighter side. You may need to adjust the length of your elastics based on your ankle circumference and preference for how it feels when you dance.
Start by turning the back heel of the shoe inside out. This will make it easier to sew. Using the back middle seam as your guide, place one end of the pre-cut elastic about 1/2 inch from that middle seam AND about 1/2 of the way down to the sole.
The elastic will extend up above the back of the shoe and then down the other side of the shoe. Use the same distance down and same distance away from the same middle seam to place the other end of the elastic. This will create a loop at the back of the shoe. This is for your foot to slip though. The entire elastic piece should look symmetrical.
If this helps you sew more confidently, use your pencil to make sewing guide lines by tracing the location of the elastic on each side. This will keep you from accidently sewing crookedly or too far down. Make sure the extending top portion of the elastic doesn’t twist. If it does, it wont lay flat on your ankle.
Sew the perimeter of the elastic. The thimble comes in very handy as the elastic is thick. It will protect your finger as you push the needle though the elastic. When you are done, knot the floss securely and cut off any excess thread.
Your shoe should look this this:

Note that you don’t have to be an Italian haute-couture seamstress. I’ve learned that it is not worth it to obsess over making the stitches perfect. Stitch along the entire rectangular area. Do not do more than one stich on the top of the shoe. You need that part to move a bit. The dental floss will hold very well and be quite strong. When you are finished with both backs, flip the back of the shoe back to normal. Try it on and make sure you like the tension. Make adjustments, if necessary. This may mean redoing it but you will eventually learn where your comfort zone is and how to replicate the lengths and positions each time your sew a new pair.
Now, for the Ribbons
For the record, I use elasticized ribbons. I think they stay more secure than non-elasticized. They don’t distract from your dancing because they lay flat with no gaping. Basically, they move with you.
Take the pre-cut ribbon and fold the end piece over about 1/2 to 3/4 of an inch. This will create a folded new end of the ribbon that will not fray. It will be more secure.
Leading with that folded end, lay the ribbon flat inside the shoe, about 1/2 an inch from the side seam AND about 1/2 way down towards the shoe sole. Note that it needs to be on the side of the seam closest to the back of the shoe. Outline where you placed the ribbon with your pencil. (You can also pin it to keep it in place while you sew.)
Begin sewing across the top of the ribbon in a straight line. Then, sew down and around the ribbon creating a rectangle of stitches until you get back to where you started. Knot the stitch securely. Cut off any excess floss. Repeat the process on the other side with the other ribbon strip. When you are finished, it should look like this:


Adjusting the Pressure Points
Try the shoes on and note where you feel pressure or tightness. Use your pencil to lightly mark a dot on the outside of your shoe where the center of the pain is felt. This is an area where you will need to create more space. You can do that using the shoe device I mentioned above.
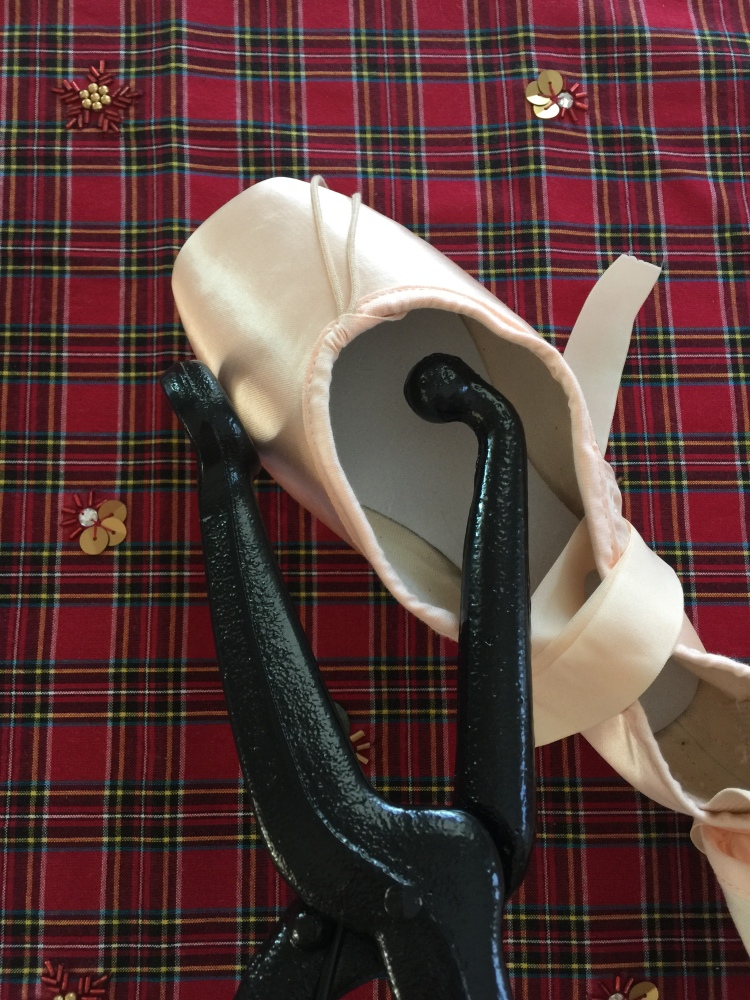
This device is technically called a *Professional Ball and Ring Stretcher. It is designed for bumping out shoe areas where a person’s bunion pinches. It can really help a dancer soften areas of the shoe that are tight. For me, it has been a fantastic way to make my pointe shoes more comfortable.
You use it by placing the ball portion inside the shoe and the circle portion around the dot you marked with your pencil. Gently squeeze the handle bringing the ball and ring together to meet. This bumps out the shoe slightly giving the natural shape of your foot a customized area to fill out. You may need to repeat the process to get the fit exact.
Other Customizations
Lastly, some dancers like to cut the satin off the toe of the shoe or even darn the toe box. Feel free to experiment with those techniques, but also be very careful. I would recommend trying any new modifications on used (but not dead) pointe shoes. Any changes you make to your usual routine should be approached slowly and definitely when you have downtime (i.e. not during a performance run).
As always, continue to strengthen your feet with regular TheraBand stretching and relevés to gain strength and further develop your lines.
Thank you for reading! Please subscribe to the blog and remember to follow me on Instagram at The_Balletomane .
